Category: How To

  • What is ‘Discord Server Boost’, how it works?

    What is ‘Discord Server Boost’, how it works?

    Discord Server Boost service offers handy features for server-owners to unlock advanced options and deliver a better in-app experience for communities.

    Using Server Boost, you and your community will be able to work together to unlock some new and improved collective perks for servers and share those epic perks with the rest of your server community.

    Many users get confused about whether to buy a regular server boost or a Nitro boost. This article will show you how to boost your Discord server efficiently.

    One Discord server can have multiple Server Boosts at a time. How many Server Boosts a server has determined what level the server is. The more Server Boosts a server acquires, the higher its level becomes.

    Related: How to create a Discord server?

    Discord Server Boost Perks

    Three levels of boosted servers can belong, each with its own set of perks. Read the list below to see all the perks available for boosted servers, grouped by level.

    Level 1 requires two server boosts to unlock

    • +50 Emoji slots (100 total)
    • 128Kbps Audio Quality
    • Go Live Streams boosted to 720p 60fps
    • Customer Server Invite Background
    • Animated Server Icon

    Level 2 requires 15 Server Boosts to unlock

    • Everything in Level 1, plus:
    • +50 Emoji slots (150 total)
    • 256Kbps Audio Quality
    • Go Live Streams boosted to 1080p 60fps
    • Server Banner
    • 50MB upload limit

    Level 3 requires 30 Server Boosts to unlock

    • Everything in Level 1 and Level 2, plus:
    • +100 Emoji slots (250 total)
    • 384Kbps Audio Quality
    • 100MB upload limit
    • A Vanity URL (a custom URL for your server to share online)

    How to boost a Discord Server in seconds?

    So, you’ve decided to boost one of your Discord servers? If so, here is how to do it.

    Before boosting, you should know which server you want to boost. Although you can always switch your Server Boost to a new server, there is a 7-day cooldown period in which your Server Boost remains locked.

    Once you are confident about which server you want to boost, you are ready to begin.

    Follow these simple steps to boost your Discord server.

    1. Open the Discord app on the desktop (Discord server boost can only be done via desktop app)
    2. Select your server from the sidebar.
    3. Click on your server name to access the Server Settings drop-down menu.
    4. Click on Server Boost.
    5. Make sure everything looks OK, then click Boost This Server.
    6. Select the number of boosts you would like to purchase.
    7. Decide if you want a Nitro subscription (this is optional, more info on this below).
    8. Enter your payment information.
    9. Confirm your purchase.
    10. Your boost is now active.

    Congratulations! You have boosted your Discord server. You will receive some special swag for boosting your server, including a server badge next to your name that evolves. Your server members should thank you later.

    How long does Discord Server Boost last?

    A server boost on Discord could last a few seconds to one month. Discord users can cancel their server boost in seconds and return their sessions to default mode.

    Not canceling your Discord server boost will leave it operational for one month. Discord users can access several benefits attached to a server boost throughout this time.

    Monthly subscriptions are required to access server boosts, even if Discord is a free app for gamers and other users.

    A Nitro boost on Discord usually comes with bonuses that could increase the server boost time. Subscribing to a Nitro boost plan may give a Discord user two (2) extra months of server boosts.

    Regular Discord server boosts remain active throughout a Nitro boost.

    When a Nitro Boost Expires?

    Nitro boosts on Discord do not last forever and have definite timelines to expire like a regular server boost. However, buying a Discord server boost ahead of Nitro may not be great for some users.

    These boosts provide more significant benefits overall than a regular server boost and are usually less expensive. Buying a Nitro boost gives you two or more boosts and a rolling 30% discount for future subscriptions.

    Buying a regular Discord server boost means constant renewal every month, but Nitro boosts can last longer. First-time buyers of a Nitro boost plan could also benefit from free extra months usually available on purchase.

    Does Server Boost last forever in my inventory?

    Purchasing a server boost on Discord could guarantee users a complementary addition to their inventory. The number of accessible servers boosts users get on how many months of subscriptions are paid for upfront.

    However, server boosts will not last forever in your inventory. Discord will remove unused free server boosts from any user’s inventory when its time elapses.

    Nitro subscribers are not exempt from this, as free server boosts can’t stay untouched indefinitely.

    Is Boosting a Discord Server worth it?

    Boosting a Discord server is worth it, as users get several add-ons and multiple bonuses. Some perks attached to boosting a server include additional emoji slots and better audio quality.

    Using boosts on a Discord server also provides subscribers a custom URL and 100MB upload space for all non-Nitro members. Boosting a server also gifts users special booster badges and a unique role on the server.

    Server boosts grants subscribers access to a massive library of games all members can enjoy.

    Three server boost levels are available for Discord users. Levels have unique additions like a custom splash background, animated server icons, server banners, etc.

    Non-Nitro and Nitro members can only boost one server every week. After the 7-day period, such users can boost other servers to get additional benefits while using Discord.

    What are the available Discord Boost plans?

    Discord server boosts can run on a monthly or yearly subscription. After a monthly server boost elapses, the Discord server loses all its added features and benefits.

    Annual boosts usually have more benefits than a monthly server boost subscription. Also, Discord server boosts on an annual plan can be renewed at a lower price than monthly options when due.

    Subscribers who wish to change their monthly Discord server boost to an annual plan must wait seven days. After the seven days, server boost plans can be changed to a yearly option or vice-versa.

    Discord users that wish to effect this change will have to forfeit the amount paid for their earlier subscription.

    How to boost a server for free?

    You can’t boost your Discord server for free! However, you can get a free month of Nitro if you’ve never used it before and haven’t logged in from mobile. New Nitro subscribers that meet these requirements get this bonus with their first purchase.

    A regular Discord Nitro subscription costs $3.49 every month after your free boost expires. Regular Discord boosts cost $4.99 per month.

    How to boost a server without a Nitro subscription?

    Discord users can forget Nitro and boost their server without it. Users who don’t see Nitro’s need and desire one boost can subscribe to a regular plan.

    But it’s worth subscribing to a Nitro plan as it includes two boosts on its lower price plus the added features.

  • How to Rename AirPods, AirPods Pro, AirPods Max?

    How to Rename AirPods, AirPods Pro, AirPods Max?

    It can be helpful to rename your Airpods to avoid getting them mixed up with other devices connected to your Bluetooth.

    Changing the name of your AirPods, AirPods Pro, or AirPods Max using your iPhone, iPad, iPod touch, or Mac takes a few seconds. Here’s a step-by-step guide to renaming your Airpods:

    Before starting, bring out your AirPods from the charging box or wear them, and make sure they’re connected to your iPhone, iPad, or Mac.

    On iPhone, iPad, or iPod touch:

    Go to Settings  > Bluetooth, and tap the “i” icon next to your AirPods. Tap the current Name, enter a new name, then tap Done.

    On Mac:

    Choose the Apple menu by clicking on the Apple symbol  > System Preferences, then click Bluetooth. Control-click your AirPods, choose Rename, enter a new name, then click Rename

  • How to deactivate, delete your Snapchat account?

    How to deactivate, delete your Snapchat account?

    Snapchat is one of the leading social apps that changed the concept of chatting with friends by sending messages into interacting with people by sending more dynamic objects such as videos, emojis, filtered photos, and many more.

    However, you may feel that you want to have a long-term digital detox far from any digital pollution. Eventually, you may decide to deactivate or delete your Snapchat account. This article will show you how to deactivate or delete your Snapchat in a few steps.

    How to delete a Snapchat account using an iOS app

    1. Click on the profile icon on the top left, then the settings icon on the top right
    2. Scroll all the way down and hit delete account
    3. Enter your password, then continue. Your account will be deleted in 30 days.

    How to delete a Snapchat account using a web browser

    1. Navigate to accounts.snapchat.com in a web browser and sign in to your Snapchat account
      • Note: If you have login verification enabled, a code will be texted to your mobile device that you will need to enter the given field to sign in.
    2. Under Manage My Account, select Delete My Account.
    3. Enter your login details in the fields on the following page and select Continue
    4. On the next page, you’ll receive a message stating your account is in the process of being deactivated.
      • Note: Once you deactivate your account, your friends will be unable to interact with you through your account. Be sure you want to do this if you want to keep up any streaks, scores, or other conversations.
    5. To permanently delete your Snapchat account, you must wait 30 days after deactivating your account. Your account will then be automatically deleted.

    If you recently deactivated your account and are trying to reactivate it, might need to wait until the deactivation process is complete, which could take up to 24 hours (according to Snapchat). Please follow the following guide.

    Reactivating a Snapchat account from an iOS device

    If you’ve verified your email address on your account, you should receive an email notifying you when your account has been successfully deactivated. Once you receive this, you can sign in to your account to reactivate it.

    If you changed your mind and want to get your Snapchat account back up and running, here is what you have to do:

    1. Open Snapchat and log in with your username and password
    2. A message will appear before you’re logged in, showing how many days are left until your Snapchat account is permanently deleted. Tap Yes if you want to proceed with restoring your account
      • Pro Tip: Alternatively, you can tap Cancel if you want to use this step as a way to check how many days you still have left before Snapchat permanently deletes the account. Be sure to log in often to avoid missing the 30-day deadline and potentially losing your account.
    3. Another message will appear, asking you to wait a few moments for the reactivation process to take effect. You’ll receive a confirmation message if you’ve verified your Snapchat account with your email address. Tap OK to wait to log back into your account when ready.

    Waiting for a Snapchat account to be reactivated

    According to Snapchat, it can take up to 24 hours for an account to reactivate. Accounts with a lot of data to recover (including friends, conversations, saved chats, Memories, and more) may take the longest to reactivate.

    If you submitted your account for deletion and tried to reactivate it shortly after that, Snapchat may not have completed the deactivation process before you tried reactivating again. If you verified your email address, you should have received an email confirming deletion/deactivation.

    If, after more than 24 hours of waiting, you still can’t log into your Snapchat account, try reaching out to Snapchat customer service to get their support team to look into the issue for you.

  • How to create business channel on Telegram?

    How to create business channel on Telegram?

    Telegram is a leading cloud-based instant messages platform. It became popular in recent years for its privacy, speed, voice and video quality, and other unmatched features over its main competitor Whatsapp.

    In 2018, Telegram’s audience reached 200 million people, with 500,000 new users joining the messenger every day. It was launched for iOS on 14 August 2013 and Android on 20 October 2013.

    What is Telegram Channels?

    Telegram offers a powerful toolset that allows businesses to create and manage channels, groups, and bots to broadcast messages, engage in conversations, and offer reliable customer support via bots.

    Today, we will address Telegram channels and how to use them for maximum benefit.

    Telegram channels enable users to broadcast messages to multiple users simultaneously. Like on social media, users need to subscribe to your channel to get access to your content published by one or more administrators.

    A Telegram channel is used for various purposes, from sharing helpful content to implementing a business strategy. In addition, you can use your channel to build and improve your company image, boost your sales, make profits, enhance customer loyalty, and more.

    How to set up a Telegram channel? (A step-by-step tutorial)

    Telegram channels fall into two types:

    1. Private channels are only accessible to subscribers and don’t appear in public searches. To join a private channel, you need to receive a link from the owner (administrator). A private channel is an excellent solution for companies and teams. You can also use this type of channel to write down personal notes, reflections, etc. By the way, you can make your private channel public at any moment.
    2. Public channels are public to the internet, regardless of whether or not they are subscribed. A public channel is displayed in search results and has a short address (link).

    Telegram Channels requirements & features 

    • Channel login must contain 5-32 characters
    • The Channel name and bio must be no more than 255 characters long
    • Each account can create up to 10 public channels
    • Unlimited number of subscribers per channel
    • Invite up to 200 users from your contacts to join your channel
    • Add up to 50 administrators
    • Activate up to 20 bots
    • Content is editable within two days of publishing
    • To delete a channel with over 1,000 subscribers, you need to contact user support

    How to create a Telegram channel?

    It’s easy to create a Telegram channel via desktop app or mobile app (for Android and iOS):

    • Telegram desktop app: In the upper left corner, click the Menu icon (the one with three lines). Select “New Channel” from the drop-down menu.
    • Telegram Android app: Open the chats list, click the menu icon and select “New Channel.”
    • Telegram iOS app: In the “Chats” tab, click the new message icon in the right upper corner. Select “New Channel.”

    Step-by-step tutorial on desktop:

    How to build a private or public channel on Telegram?

    Select “New Channel”

    How to create a business channel on Telegram? (Tutorial)

    A new window will come up. Enter your channel name and bio. (See the character limits above.) Click “Create.”

    How to create a business channel on Telegram? (Tutorial)

    In the next window, choose the type of your channel. If you want your channel to be public, you need to develop a link for it. In the screenshot below, it’s ”/catmarketing.” If your selected link is unavailable, you’ll need to suggest another option.

    How to create a business channel on Telegram? (Tutorial)

    You can invite up to 200 people from your contacts to join your channel as the next step. Select the users you want to add and click “Invite.” You can skip this step altogether.

    How to create a business channel on Telegram? (Tutorial)

    Done! Now you’re the proud owner of a Telegram channel. The next step is to set up and customize your channel.

    How to customize a Telegram channel?

    The visual aspect of channels is very critical. In fact, design is the first thing that a potential subscriber pays attention to, even though unconsciously.

    The main design elements of your Telegram channel include a name, bio (brief description), and avatar. Your bio should be:

    1. Concise
    2. Clear
    3. Informative

    While the character limit is 255, try to fit into 200 characters. This way, users will be able to take in your text fast and efficiently. Reveal the essence of your channel and provide contact information. For example, you can add a bot name, link to your pricing plans, etc.

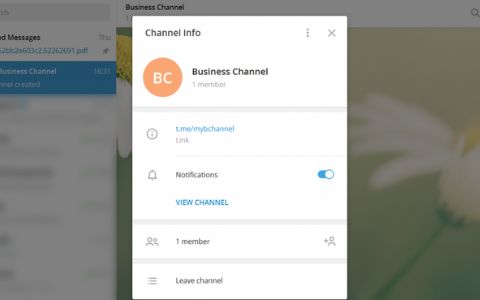
    To view your bio, click the Menu icon and select “View channel info.”

    How to create a business channel on Telegram? (Tutorial)

    How to Create a Private or Public Channel on Telegram?

    When choosing the right name for your Telegram channel, use the language of your target audience. The name must sum up the essence of your channel in 1-3 words. If you’re planning to expand your Telegram audience, it makes sense to incorporate keywords into your name.

    To edit your name or bio, click the Menu icon and select “Manage Channel.”

    How to Create a Private or Public Channel on Telegram?

    Telegram Channel avatar size/dimensions

    The optimal dimension of the avatar on Telegram is 512px by 512px, and it’s recommended to use PNG format to deliver an unpixelated avatar.

    To upload a logo, click the Menu icon and select “Manage Channel.” In a new window, hit the Camera icon.

    How to Create a Private or Public Channel on Telegram?

    Add the logo from your device. Adjust the visible area of your image. Congratulations! Now your Telegram channel has a face Click “Save”.!

    How to manage your Telegram channel?

    Administrators

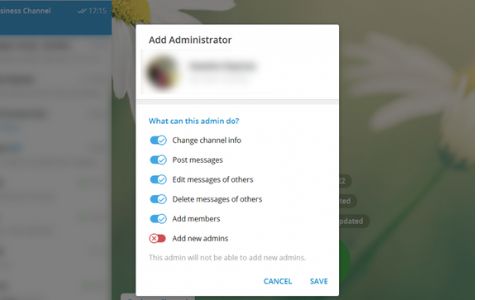
    The creator of the channel becomes its administrator by default. If you need help managing your channel, you can add more administrators from your subscriber base. You can provide each admin with limited or full rights to manage the channel. For example, you can allow an administrator to publish and edit content while withholding the right to add new subscribers.

    Select: SettingsManage ChannelAdministratorsAdd administrator. From your list of subscribers, select the correct user. A new window will appear on the screen. Check the rights you’re willing to give to your administrator.

    How to Create a Private or Public Channel on Telegram?

    Click “Save” ;

    Hashtags

    Hashtags are a fast way to find the correct information on social media. To put your content out there, be sure to add hashtags to each post. We have two intelligent tips to give you:

    • Avoid compound hashtags that consist of several words. If you have a hashtag like #marketingnewsinusa, split it into smaller hashtags: “#marketing, #news, #usa.
    • Write your hashtags in the language of your target audience.

    Polls

    A few years ago, you had to use a special bot to run a poll on Telegram. Now you can easily do that yourself in two clicks. Hit the Menu icon and select “Create Poll.” Write your question and add up to 10 options. Running polls is a powerful strategy for getting feedback from your audience. If you’re considering the possibility of modifying your channel in any way, be sure to ask your subscribers’ opinions first.

    Some Telegram Channels content management tips

    • Don’t publish new content at nighttime. Since not all users disable notifications for the night, you risk inadvertently disturbing them.
    • Find your optimal posting schedule and stick to it. The peak posting times include 8 am, 6 pm, and 8 pm on social media. Try to publish serious stuff in the morning and leave less demanding content later in the day.
    • Choose quality over quantity. Remember that one high-quality post is better than five short publications of questionable value.
    • Your posting frequency depends on the topic of your channel. If you have a news channel, it’s OK to publish new content every day (or even every hour). For other industries, stick with 2-3 large posts a week.
    • Users are more open to new information on workdays rather than weekends.
  • The best bots to enrich your Discord Server in 2022

    The best bots to enrich your Discord Server in 2022

    Discord bots are vital tools that automate tasks on your Discord server in order to build a genuinely engaged community. Discord bots allow server owners to moderate communities as well as add engaging features such as games, music, memes, and more.

    This article will list the top bots to make the most of your Discord Server.

    Reasons to use bots with Discord

    Bots are simply computer programs that interact with humans (and sometimes with other bots) to perform certain functions automatically.

    A website with a helpful chat window opens up, offering to talk with you about their product or service; that’s a bot.

    Bots can be helpful or infuriating, depending on their purpose, design, and deployment.

    On Discord, bots provide a variety of productive and not-so-productive features to the community on the server where they “live.”

    You can add bots to your Discord server that help you moderate members or make your server a little more unique and fun.

    For example, some bots play music, bots that offer amusing memes on request, bots that fetch your game stats for you, and bots that play a loud air horn noise on the channel when prompted to do so.

    How to add a bot to a Discord Server?

    Adding bots to a Discord server can be a long process, especially for the first time. Once you get the hang of it, it’s pretty simple. Here are two essential requirements in order to be able to connect a bot to your Discord server.

    Step 1: Turn on administrator access

    In order to add a bot to a Discord Server, you will have to be an administrator. If you don’t own the server, it’s probably good to check with the owner before adding anything.

    1. From your Discord home page, select the server you’d like to add the bot to (on the left-hand side of the Discord Website).
    2. Once Selected; Choose the drop-down menu (the server name in the top left-hand of the screen with a small down arrow).
    3. Tap Server Settings.
    4. Tap Roles.
    5. Click on Default Permissions.
    6. Scroll down to the Advanced Permissions setting and toggle Administrator on.
    7. Click Save Changes.

    Step 2: Authorize the bot to access a Discord Server 

    It’s important to note that depending on your bots’ source website; you may see “Invite” or “Add Bots.” We will use the Dyno bot for this example, but the instructions may vary if you’re adding another Bot.

    Keep in mind that you will need to perform these steps for each server you own or moderate.

    Here’s how to add a bot to your Discord Server:

    1. Visit the website of the bot you want to add. Then, click on the option to log in.
      Note: Each source will have slightly different instructions. But overall, most follow steps similar to these.
    2. Log in using your Discord credentials. Then, select the server where you’d like to use the bot and click ‘Continue.’
    3. Make the selections appropriate for your server and click Authorize.
    4. Go through the setup process.

    Note: If you have trouble finding your server, make sure that you are logged into Discord in the same browser you’re using for the Bots’ website. Also, verify that you are signed into the correct account.

    How to manage a Discord bot?

    Now that you’ve added your bot let’s review how you can manage it. Most bots have a dashboard located on the website with comprehensive controls for moderation. But you can make some adjustments in Discord’s settings too. The instructions below will vary depending on the bot you’re using.

    1. Head over to the bot’s website and click on the Dashboard option.
    2. Scroll down the page and sift through the controls that your bot offers.
    3. Make changes as you see fit.

    Again, each bot will have different instructions and different capabilities.

    Discord is very careful with bots and sometimes requires multiple authorizations to enable one to work. Even though the platform uses Oauth2 to permit a bot to access and interact, you may still see a prompt to authorize it within the channel.

    The top bots for Discord

    Here are the six top used bots for Discord on the internet to tackle moderation and music automation and integration.

    Hydra

    When it comes to music, Hydra has commands for queueing songs, pausing, skipping, replaying them, etc. Unfortunately, this bot has been forced to drop YouTube support. But at least it does support Spotify.

    Additionally, Hydra also has administration commands. You can use it to ban users, limit users’ DJ roles, kick, move around, announce, and more. Hydra Premium brings even more DJ commands. Anything from boosting bass levels to adjusting speed.

    Hydra’s web dashboard which lets you customize the bot however you want, is also a great feature.

    Fred Boat

    Fred Boat is another solid choice as a music bot for Discord. It supports YouTube, Soundcloud, Bandcamp, and even Twitch. It’s possible to queue live streams too. No support for Spotify, though.

    A variety of commands are available. Playing, queueing, skipping, shuffling, and more can be executed with many of the commands listed on Fred Boat’s website.

    Fred Boat’s advantage over other bots is that you can view the player on the web with a UI. You can use this to adjust your queue instead of relying on commands.

    Octave

    Perhaps not as well known as the other music bots, Octave is still an excellent addition to any Discord server. Being less popular can also have benefits, as it is less likely to experience downtime and lag.

    Octave is frequently updated to ensure it works properly, the commands are simple, and it is generally straightforward to install and use.

    All three of these music bots are solid, so choosing which to use will likely be a good one.

    MEE6

    For server owners looking for advanced automated moderating, MEE6 should be the first choice.

    With a simple set of commands, you can add a welcome message for every new user, either posted in a shared text channel or sent privately. There is even an option for automatic assignment of roles.

    You can also add custom announcements or messages when a user joins a voice channel.

    You can automatically block designated types of content and even ban users who share such content. Automatic mutes, kicks, and much more can be applied. If it’s appropriately set up, MEE6 can effectively replace the role of a human admin of your server.

    With MEE6 premium, you can reward users with unique roles once they reach a certain level, connect multiple Twitch and YouTube channels to your server, and customize your moderation messages.

    MEE6 premium costs $11.95/month, $49.99 for a whole year, or $89.90 for lifetime use on one server. Send out a MEE6 bot invite through the MEE6′ website or a bot list like top.gg.

    Dyno

    Dyno provides similar advantages and benefits to MEE6. It offers simple automation for many management tasks.

    You can view logs of deleted messages and kick and banned users, which can help keep an eye on the users on your server.

    Alongside its many moderation commands, Dyno can play music, and games, flip coins, search for topics, and more!

    With a premium Dyno account, the bot can create custom embedded messages, special text channels that can be viewed when a user is in voice chat, and auto-purge settings that let you delete all messages from a channel after a given amount of time. Premium costs $4.99/mo for one server or $11.99/mo for three. Send out your Dyno invite today and start using one of the top Discord bots for moderation.

    ProBot

    Welcome images, voice/text levels, reaction roles, logs, high-quality music, moderation, and many many more! ProBot has all the expected auto-moderation features and auto-response and supports 13 languages.

    ProBot is a great alternative to Dyno and MEE6 is ProBot. Its creators claim 99.99% uptime, making it one of the most reliable bots available in the market.

    ProBot is a relatively new Discord moderation bot that includes welcome bot messages, auto-response, and anti-raid protection. It can work as a Discord welcome bot that sends new members a custom welcome message that consists of the member’s avatar and name.

    When a user breaks the rules, ProBot Discord can warn, mute, kick, or ban a member from a text or voice channel or your entire server. It can also move the offending member into a voice channel where a human moderator can talk about their behavior. You can set automatic responses to specific words or messages. If a whole channel is acting up, ProBot can lock the channel and clear its messages.ProBot can also play music, auto-assign roles, and assign XP to members.

    In addition to the above free features, ProBot Discord offers two paid plans–prime and premium. Prime lets you adjust your music volume, unban all banned users at once, and implement more advanced anti-raid features. Prime costs $2.50/month or $24.99/year. Premium includes the above features while also letting you change the name and avatar of your server’s ProBot. It costs $9.99/mo or $79.99/yr.

    If you haven’t set up your Discord server yet, we’ve gathered all the information needed to create your first Discord Server in this Article: How to set up a Discord server: the ultimate guide”

  • How to delete your TikTok account permanently

    How to delete your TikTok account permanently

    There are many reasons to keep your TikTok account and many other reasons to delete it. Time wasting, and invasion of privacy, are among many reasons to consider deleting or deactivating this trendy worldwide application.

    So if you are thinking about deleting it, here’s a step-by-step guide to delete TikTok account:

    1. Make sure to log in to the account; there is no way to delete the TikTok account without logging in.
    2. Launch the app, go to your profile, then select the “…” icon in the top-right corner.
    3. Select Manage My Account. It will reveal your Tikcode, phone number, and password.
    4. To delete the account, make sure you have a registered number associated with the account.
    5. Click on the Phone number section, and enter the correct number. It will verify through SMS.
    6. Next, set up your password. 
    7. Once the above two steps are complete, a new option will appear at the bottom–“Thinking about removing your account?“.
    8. Tap on it, and click on the Send code link.
    9. An SMS will arrive, which you need to enter the box and click on continue.

    Note that you have to make sure that you are on the latest version of the app. This option to remove the account became available only in later updates. So if you are running an older version, the choice could be missing.

    What will happen when you delete or deactivate your TikTok account?

    You will miss the following things when you remove or disable your Tiktok Account:

    • No login access
    • Lose all the videos
    • No refund for any previous purchases
    • Chat messages you have sent across to anyone will remain visible
    • Comments would remain visible unless you deleted them before deactivating your account

    Also, this method is to delete the TikTok account permanently. After 30 days, final account deactivation will happen. During this time, the account will be visible to the public. To retrieve the deleted TikTok account, you will get your TikTok id; make a note.  Next, click on continue and then click again on the delete account.

  • How to set up a Discord server: the ultimate guide

    How to set up a Discord server: the ultimate guide

    Unlike Skype, Zoom, Whatsapp, or any chat app, Discord has become an invaluable tool for users in the past two years providing a seamless place to communicate over text and voice in a world where people from various communities spend their time hanging out on it for different purposes.

    What is Discord?

    Here is all that you need to know about Disord. So, let’s get started!

    In 2015 Discord was first launched to easily communicate while playing PC games together. About 70% of active Discord users in 2020 reported that they use the platform for nongaming purposes or a mix of gaming and everyday use.

    In 2021, Discord heavily expanded moderator tools with expanded server roles, more automation, easier bot integration, and a timeout feature.

    In 2022, it’s clear Discord doesn’t belong to gamers anymore.
    The service allows users to create servers, which can consist of a variety of text and voice channels with high-quality features.

    Discord lets you do the following by making a free account:

    • Chat in high-quality, low-latency voice channels for an unlimited amount of time
    • Send instant messages to friends or groups of friends
    • Stream HD video capture from your computer or phone, also low-latency and unlimited
    • Watch multiple streams at once with individual volume sliders
    • Organize servers with communities of thousands
    • Talk in group video calls
    • Share small-ish files with friends
    • Add bots to servers that add new functionalities, like a group radio

    What are Discord Servers?

    A “Discord server” is a place on Discord for groups of all sizes to talk in. But that doesn’t explain what makes a server special.

    In fact, that’s what a lot of Discord servers are about — people come from all sorts of different corners of the world, but no matter the distance, they can get together on Discord and talk about anything they’d like with whoever they want.

    You can chat with your friends without feeling lost in the many conversations going on at once for free!

    How do you start a Discord server?

    First, download the app for your computer or smartphone at discord.com/download. Alternatively, you can access Discord on any computer you can use a web browser on, without downloading an app, at discord.com/login.

    Once your account is set up and you’re signed in, you’ll see a green + (Plus) button on the left side of the app. Choose that, and you’re on your way to making a new home.

    You’ll then be asked what the server’s about. You’ll be given a different set of starter channels to talk in depending on your answer. More on what channels are later.

    For example, we’ll use the “Friends” template, but feel free to pick which one works best for you.

    Next, the most critical part of any server or group: The name. No matter what our friend group chats about, we all have one thing: we love houseplants. Let’s call it… “Plant Pals.”

    If anything ever happens or you’ve left the houseplant lifestyle for greener, you can always change the server name and icon later on.

    You’re done! Your new server for you and your closest friends is ready to roll. But it’s missing something important… your friends!

    How can you invite friends to your new server?

    In the middle of the chat window, you should see a big “Invite Your Friends” button. Hit that, and you’ll see the option to either invite your friends directly or share an invite link.

    You can always invite friends through the “Invite” button in the server’s drop-down menu on the top-left if it’s not there.

    After inviting friends and sharing your invite link, soon, everyone will be gathered in your new home!

    Pro tip: You can also invite your friends by creating a custom link when you unlock the last Perks Package in your server boost.

    How to create your first Discord Server?
    Discord Booster Packages

    Differences between ‘Text Channels’ and ‘Voice Channels’?

    You’ll see a few lists in your new server called “Text Channels” and “Voice Channels.” These are where you and your friends will be talking in various ways.

    Text channels behave similarly to how you may send messages on other platforms. They’re where you send messages to your friends, share photos, files, or one song stuck in your head. You can even type out someone’s using name starting with an “@,” and they’ll be notified, such as “@Fern.”

    Every channel has a name associated with it and holds its chat history. You can think of a channel name as the conversation topic for that channel. For example, in a text channel named #general, you’ll talk about anything and everything on your mind, while a channel called #plant-talk could be best suited for showing off that newest ficus.

    By default, when you make a new channel, everyone will be able to see and post on it. It’s like making a new group to talk in without having to re-add everyone again like you would in a regular chat group.

    Voice channels are part of what makes Discord special. The Discord server is like having all your friends over. Voice channels are what make this possible.

    Click on a voice channel, and you’re placed in a room to talk with your device’s microphone. It’s like walking into a room with your friends and joining their conversation! Unlike Direct Messages, users in a server won’t be startled by a ringtone when they enter the voice channel.

    Voice channels also allow you to use your device’s camera to see your friends for a video chat. You can also share your device’s screen to show your friends how good you got on that one game or how complex your plant watering schedule is.

    You can have unlimited people in a voice call at once, and up to 25 people video chat simultaneously. Up to 50 people can watch someone’s shared screen.

    How can you add or remove new channels?

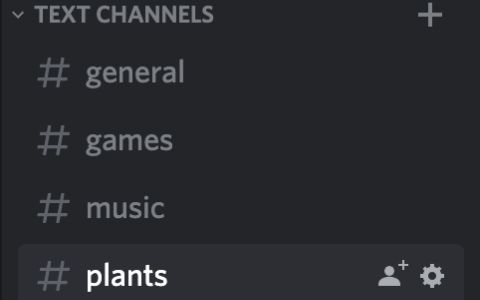
    When we made our “Plant Pals” server, the “Friends” template we used included channels called #general, #gaming, and #music. Since we’re big into houseplants, our friends want a place where we can focus on talking about and sharing tips on taking care of our plants. So, let’s make a channel for that!

    To make a new channel, head into your server’s drop-down menu on the top-left and select “Create Channel.” It’s the same menu you used to make an invite! If you’re on mobile, slide to the right to open your channel list, tap the server’s name and choose “create a channel.”

    Making a new channel is as easy as typing up a name!

    From there, a menu pops up, letting you customize your channel. We’ll be making a text channel for this, so choose “Text Channel” and give it a name. Let’s keep it simple and call it “#plants.”

    How many channels should you have?

    When creating more channels, it’s best not to get crazy with the channels — if you’re starting with your server, you’ll want to get a feel for how your friends use them. To keep things comfy without overwhelming others, It’s recommended to start with a small number of channels and adjust your channel selection as time goes on.

    Let’s think about our new #plants channel: “plants” itself is a broad subject that can result in many different topics to discuss. Specific conversations, such as “what pot should this fern be in?” will likely be addressed, answered, and moved on after a short period. There’s no need to make a whole channel called #what-pot-should-this-fern-be-in.

    How to create your first Discord Server?

    Servers can be pretty flexible — you can always add a new channel when you want, and you won’t have to reinvite your friends each time you make a new channel.

    You can also delete channels when you don’t need them anymore, but once a channel is deleted, everything within it is gone for good. Be sure to make 100% certain you want to delete the contents of a channel before it’s gone — sometimes, keeping an unused channel around is better than deleting it outright.

    Can you limit channels to just a few friends?

    Yes, you can! To help, you can designate a channel to be only a Private channel, only accessible to specific members and roles you decide. Roles can be powerful tools for larger servers, so we’ll stick to specifying precisely who we want within our small friend’s server.

    As you’re making a channel, you’ll see an option to create a Private channel. Toggle that on, and hit Next.

    Specify who should see the channel, and hit “Create” Channel! You’ll see a brand new channel pop up, and if it’s a Text Channel, a list of the members who can see it.

    Suppose someone ever wants to be added or removed from a private channel after it’s already been made. In that case, you can right-click on the channel (or long-press on mobile), select “Edit Channel,” and head to Permissions, where you can adjust who can see that particular space.

    Now You’ve got a unique home for your closest friends! How wonderful is that!

    Now that you’re all set up in your server keep going and have fun! Feel free to hang out in a voice channel, post adorable photos, or wave hi to each other in a video call, no matter where you may be.

    Your server is your private home; you can share whatever you like with whoever you want!

    How to make the best of Discord using “Server Boost”?

    Discord is a free-to-use app. However, if you want to dig deep and extract the treasure of your server, Discord has something called “Server Boost” where a server unlocks many extra/pro features including:

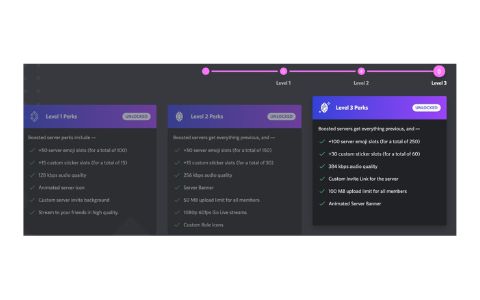
    Level 1 Perks

    • +50 server emoji slots (for a total of 100)
    • +15 custom sticker slots (for a total of 15)
    • 128 kbps audio quality
    • Animated server icon
    • Custom server invites background
    • Stream to your friends in high quality

    Level 2 Perks

    • Boosted servers get everything previous, and —
    • +50 server emoji slots (for a total of 150)
    • +15 custom sticker slots (for a total of 30)
    • 256 kbps audio quality
    • Server Banner
    • 50 MB upload limit for all members
    • 1080p 60fps Go Live streams
    • Custom Role Icons

    Level 3 Perks

    • Boosted servers get everything previous, and —
    • +100 server emoji slots (for a total of 250)
    • +30 custom sticker slots (for a total of 60)
    • 384 kbps audio quality
    • Custom Invite Link for the server
    • 100 MB upload limit for all members
    • Animated Server Banner

    You can get the benefits mentioned above by:

    1. Either buy Server Boosts separately for your own server at $4.99 per month. Boosted servers get perks such as additional emoji slots, higher audio, and video quality, and animated server icons, depending on how many boosts they’ve received. Or;
    2. Discord Nitro: this premium subscription tier ($9.99 per month, or $99.99 per year) gets you benefits such as bigger upload size limits, HD video for streaming and screen-sharing, animated avatars, and custom emojis.

    Nitro subscribers also get two Server Boosts, which are essentially tokens that you can spend on a server to make it even better.

    Pro tip: Subscribing to Discord Nitro might be more cost-effective; as it gets you two Server Boosts for free upon subscription. Those two Server Boosts may last up to 3 months, unlike the Server Boots you buy separately which only last for one month.

    Not interested in making your own server?

    There are plenty of public servers out there that may be relevant to your interests. If you click the Explore Public Servers icon at the bottom left of the app, you can browse a ton of cool communities, from official servers for games like Minecraft and Fortnite to communities dedicated to things such as game development and language learning, and so on.

  • How to fix ‘the wifi network requires a WPA2 password’ on mac?

    How to fix ‘the wifi network requires a WPA2 password’ on mac?

    While traveling abroad and trying to connect to new wifi networks to do some work, you might face some difficulties to connect. The solution here differs, so I’m gong to list most common issues and their fixes as they appear to me.

    As a mac user, I usually select the wifi network, enter the password and connect, but sometimes illogical errors appear and I do not know what to do.

    Most Common Fixes to “the wifi network requires a WPA2 password”

    I spent an hour trying to figure out what’s wrong, there’s a lot of advice on this problem and it’s been persistent. I tried all of the usual suggestions without any success:

    • Forget the WIFI network, remove it from System Preferences – then reboot
    • Delete Spaces preferences in the Library folder – then reboot
    • Rebooted the WAP/router
    • Change the WIFI password on the router

    Until I found a discussion on Apple Community addressing the same issue “the wifi network requires a WPA2 password” and providing a solution. It is really a simple yet very effective one.

    One easy step to fix “wifi network requires a WPA2 password”

    • Open System Preferences / Network / WIFI / Advanced / TCP/IP and then click the Renew DHCP Lease.

    The wifi instantly connected ✅

    I hope this helps with this annoying issue.

  • How to deactivate your personal Facebook account?

    How to deactivate your personal Facebook account?

    Anyone may think of deactivating their Facebook account regardless of why. Deciding whether to deactivate or delete your Facebook account is critical as for deactivation, you can retain it, but deleting means, you will lose all data for good.

    Deactivating your Facebook account means you want to take a break from Facebook temporarily, and you may think of returning to Facebook whenever you want. However, deleting your Facebook account means you want to get rid of your account permanently. You only have 30 days to change your mind and restore your account. After 30 days, you can’t do it anymore.

    Here’s a detailed guide for deactivating or deleting your Facebook account and the differences between them.

    All steps are the same if you are a mobile or PC user.

    Deactivating your Facebook account

    When you deactivate your Facebook account, you can come back whenever you want. While it’s deactivated, users can’t see your timeline or search for you, and Facebook will deactivate the pages you control. However, some information, like messages you send, may remain visible to other users.

    Step-by-step to deactivate your Facebook account

    • Go to your main profile, and click the arrow icon at the top right corner.
    • Choose “Settings & Privacy,” then “Settings.”
    • On the left column, you’ll see an option called “Your Facebook Information.”
    • Head toward “Deactivation and Deletion” at the bottom of the page. You’ll then be given the option to deactivate or delete.
    • Choose “Deactivate” and follow the necessary steps.
    • Keep in mind any time you log in after this automatically reactivates your account.

    Deleting your Facebook account

    It’s permanent when you delete your account, and you can’t go back. Everything you have added to your account is deleted permanently within a few days of your decision. Friends may still access messages you sent after you deleted your account. Facebook says copies of some data, such as log records, may stay in their database “but are disassociated from personal identifiers.”

    How to delete your Facebook account?

    Take the same steps as deactivation; only you will choose to Delete. After that, take the necessary steps, and your account will be deleted.

    In case, for any reason, you change your mind after choosing to delete, Facebook says you have 30 days to cancel the account deletion. Facebook also says it takes 90 days to delete everything tied to your account.

    If you choose to delete it, you might also want to download a copy of your information on Facebook, such as photos or videos.

  • How to Delete your Twitter account permanently?

    How to Delete your Twitter account permanently?

    It’s time to quit when you find yourself just scrolling down reading bad news, or boring topics. If you are ready to get rid of tweeting once and for all, here’s a step-by-step guide for what you can do to delete your Twitter account permanently.

    You have to deactivate your Twitter first

    While Twitter allows you to deactivate your account just like Facebook and Instagram, it works a little differently. To delete your Twitter account, you have to deactivate it first.

    To do this, go to “More” on the left side of the screen, then “Settings and Privacy.”
    Under “Your Account,” you’ll see the option to deactivate your account.
    You can choose to reactivate your account after 30 days or after 12 months. If you don’t reactivate, your account will automatically be deleted after 30 days.

    What happens when you deactivate your Twitter?

    Your username and profile will not appear on Twitter’s website or mobile app once deactivated. If you notice your account gets reactivated without signing in to the app, it might be due to third-party apps. Those are the apps you’ve permitted to connect to your Twitter account. Make sure to revoke third-party access.

    What happens when you delete Twitter?

    If you don’t sign in to your account for 30 days after deactivation, it will be permanently deleted. That means your username can be claimed by anyone as it will not be registered anymore, and all your old tweets will be gone.

    However, your information might still appear on search engines like Google and Bing. You have to follow up with the appropriate search engine to remove that data.

    In addition, if you still want to get back those old tweets, Twitter allows users to download their archives.